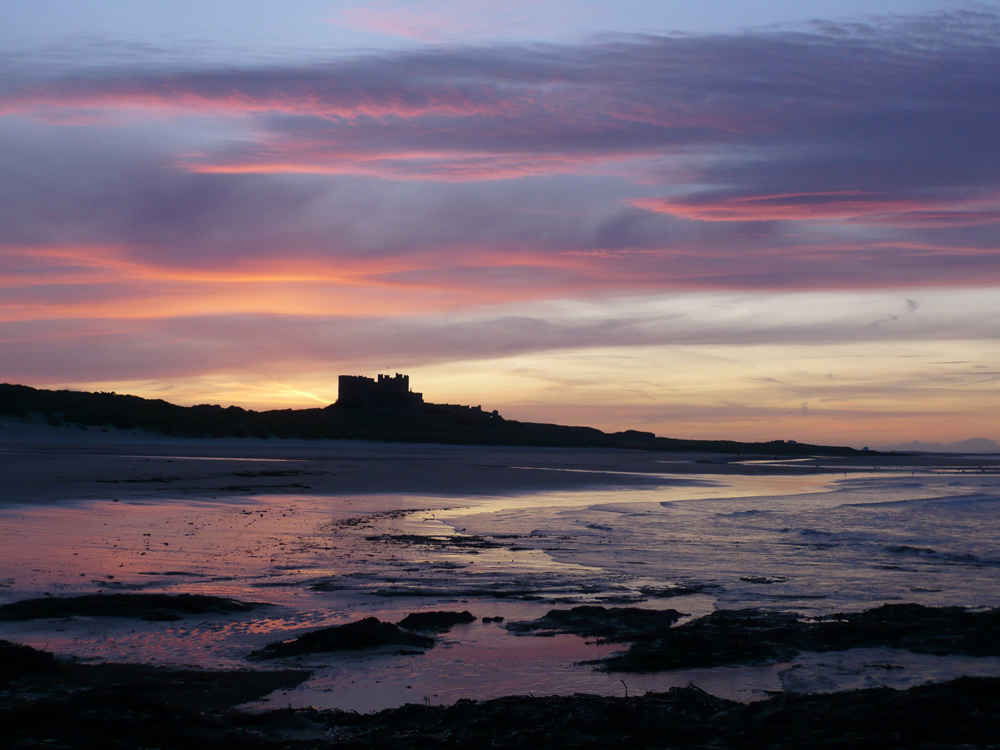
The shot above was taken on Bamburough beach in Northumbria at 6.55 am
I am in the process of producing some practice/development shots taken at various locations in and around the uk to use as evidence for my course work. I will be producing my final images later in the course
The images displayed here are all location shots taken at various outdoor locations using a variety of different methods,skills and techniques which have helped me to develop my photography even further and hopefully take it to the next level.
T
I am constantly trying to develop my photography even further, learning new skills and techniques which I hope will help improve my photography and add to my creativity
The images diplayed here are not by best and far from it. There are a lot of times in photography where I end up feeling very dismayed frustrated and disillusioned mainly because the 3 most important elements to produce a good image do not always come together and are not always evident at the same time
The 3 main elements of a good image which I consider to be really important are:
1- Really good composition
2- Good subject matter or location
3- Excellent lighting
I always pre plan my images and know exactly what content I want to show in my images. I compose my images with great care and will not settle for "that will do" If I cant' compose the shot or some of the elements are missing I don't take the shot
I find I am becoming more selective with my image content and don't agree with the philosophy of taking 20 images of the same shot and hope to to achieve at least one decent one. With this type of image taking the photographer is not considering composition,lighting etc and in artist's terms will never produce a masterpiece
This shot here is all about being at the right place at the right time. This foam was created when the tide was coming back into an estuary at a phonominal rate, 2 minutes after this shot was taken the foam had dispersed and the shot was lost
Again the lighting here was to severe.The shot was taken early in the afternoon and the brightness reflected of the foam was very intense which was washing out my image. To remedy this condition I could'd reduce the intensity of the shot by reducing the ISO as I was already on my camera's lowest ISO setting of 100. I always try to shoot at 100 as this setting always retains the most detail and clarity.The only other technique's I had avaiable to me were to increase my shutter speed or choose a higher F stop and use a smaller apperture. As the shot was a landscape I chose a higher Fstop of F11 from F8 whch halfed the light again entering the camera reducing the light intensity. Using F11 enabled me to increase my depth of field which is more suited to a landscape shot

This shot was taken at 2 pm in the afternoon whch is not an ideal time to take this sort of shot. The sun was high in the sky with brilliant sunshine which does not give the photo any kind of depth and form and produces vivid blue skies which are not pleasing to the eye.
I had to travel to this venue just befor sunrise to record the ideal shot but when I arrived the sky was so dull and bland with no sunlight evident that I abbandoned the shoot. We stayed at this location all afternoon hoping to capture the castle as the sun went down tried but unfortunately after this shot was taken the skies clouded over again whch was another wasted day
The sun did break but this was the middle of the afternoon.This was the only time on this particular day when the sun broke which enabled me to record a half decent image
I took this shot just as the sun was going down but again 1 of the 3 elements let me down. The lighting was missing which was so poor,flat and uninteresting which created a pretty flat image
This shot would have been far better taken ist thing in the morning or just before dusk when we have a low level lighting which is far superior and produces shadows, depth and form. The ideal lighting conditions for most out door photography and especially landscapes is what's known as the golden hour. This is the time of day just after sunrise and just before dusk when the sun produces a lovely rich type of warm light that is only produced at these times of the day. An example of this can be seen in my first shot at the top of the page whch has captured the golden hour lighting as the sun was coming up over the horizon, 2 minutes later this special kind of light had disappeared
Shown below are a set of images I took of Bamborough castle in Northumbria which shows the ever changing light conditions taken over a couple of minutes. The images show the lighting changing the colour of the clouds from pinky blues to orange just before the sun goes down
I had vistited this location on a couple of previous nights trying to compose some nice cloudscapes but the clouds and lighting were not evident and a decent image would have proved inpossible. On this particular night everything was perfect,location,composition and lighting all critical elemets to produce a good photograph
I took the images below with a budget compact point and shoot pocket camera lent to me by a friend as I had earlier had an accident with my 7D camera and dropped it in the sea
It just goes to show you don't need to have the best camera in the world to produce some lovely images, after all a camera is only a box with a hole in it. I just made sure I got the key elements correct,location,lighting composition and timing
The meta data shown here in this grab shows a shutter speed of 1/40 sec which any photographer knows, hand holding a camera at this speed will result in blurred images. I remedied the camera shake by mounting the camera onto my tripod, setting the camera settings onto a 2 second self timer which eliminated any evidence of camera shake
This camera was lent to me by a friend in an emegency and didnt have any manual modes. The ISO of the camera did go up to 800 but I have learnt from experience using these compact cameras with high end ISO's you end up with extremely high noise levels which can ruin the shot
As I had my tripod at hand I could still use the camera's lowest ISO which was a 100 to maintain clarity with hardly any noise visible